Saturday, 23 January 2016

Creating CSV Import in Netsuite

Inserting and Updating  Records In To The NetSuite System Using CSV Import:


CSV File Creation:

  •  Create the Fields for you want insert or update values of the Netsuite Systems Concern Records. For Example:1.Customer Record 2.Employee Record.

  • If you are Creating the CSV  Import Files for Inserting New Records in to the System means add all the Mandatory Fields for that Records as well as for the fields you want to insert data otherwise it show error while running the Insert CSV Import.

  • If you are Creating the CSV Import Files for Updating the Existing Record you add the Field Called "Internal ID" for that Particular Record otherwise it show error while running the Update CSV Import.

  • While creating the Fields in the CSV File, it is best practice to create the field name same as the field name available on the Netsuite System Concern Records. For Example .If you are creating the CSV Import the Inserting (or) Updating the Customer Record. create field's in CSV File as Same in the Customer Record.

  • while creating the mapping of fields Netsuite System  Automatically Recognize the similar field  or else we have to manually map the fields to the available matching Fields in the Netsuite Systems Records.


CSV Import Benefits: 

  • CSV Import are used to import large files in to the Netsuite System with one Click.

  •    CSV Import saves the time by avoiding manually entries of  the new record using automatic inserting or updating the record.  

   Following steps are used to create an CSV Import       

          1.Navigation

          2.Scan and Upload CSV File.

          3.Import Options

          5.File Mapping

          6.Filed Mapping

          5.Save Mapping and Start Import 

1.Navigation : 

  •      For Creating the CSV Import we have to Navigate Setup --> Import/Export --> Import   CSV  Records.    

Navigation for Creating CSV Import

 2.Scan and Upload CSV File.

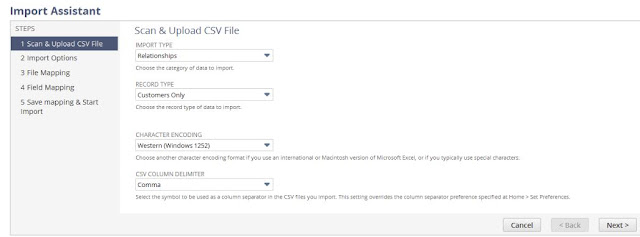
  •     Choose the IMPORT TYPE as you want.  In our Example I have chosen the import type "Relationship" for importing the Customers Records in the Netsuite System
  •     Choose the RECORD  TYPE as you like. I have chosen the record as "Customers Only" for importing the Customers Record Only.
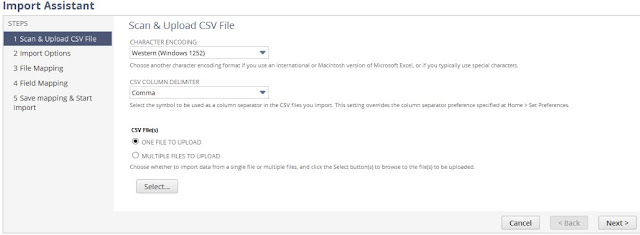
  •      Choose the CHARACTER ENCODING which suits to your Netsuite System. I have chosen the "WESTERN(Windows 1252)"  Format.
  •   Choose the CSV COLUMN DELIMITER as you want .
  •     Choose  the  CSV Files you want to Upload,we Upload Single File or Multiple Files at an Time.
  •     Then Click Next Button to Proceed.

Selecting Import Type,Record Type,Character Encoding,CSV Column Delimiter


Uploading CSV Files
Uploading CSV Files

  3.Import Options

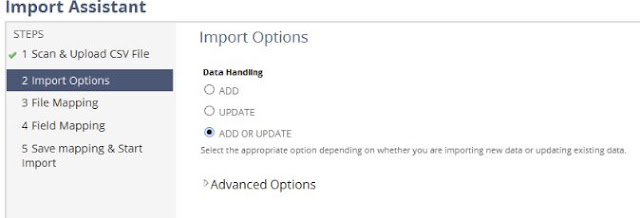
  •     Choose the type of import option as you want:

    •           Add:

                   Using Add option you can new records in to the Netsuite System

    •           Update:

                 Using Update option you can modify existing  records in the Netsuite   System.  

    •         Add and Update :

                 Using Add and Update option you can add new records as well as update existing records in  the Netsuite System.


    Import Option
    Import Option


   4.File Mapping :          

  •  File Mapping is nothing but the Mapping of your uploaded file to concert records  in the Netsuite System.
  • Netsuite System will automatically takes care of the File Mapping. 

  5.Field Mapping :

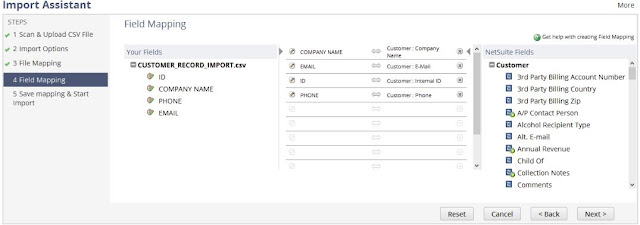
  •   Filed Mapping is process of mapping the fields of what we created in CSV File to the Fields Available in Netsuite System Records
  •  Field Mapping consist of three Columns namely:                 
                          1.Your Fields Column (Left Column)
                                    This Column contains the fields of what we have created in the  CSV File.
                          2.  Matched Fields Column  (Center Column)
                                    This  Column it display all the matching  from Your Fields Column an Netsuite Fields Column.
                         3.Netsuite Fields (Right Column).
                                     This Column contains all the fields of the Netsuite Systems Concern Record.
  •      Click Next Button to proceed.
Field Mapping
Field Mapping

 6.Save Mapping and Start Import 

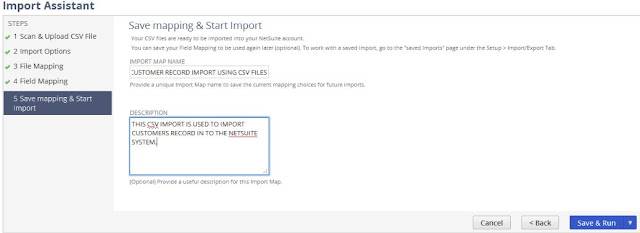
  •   Give the Name for the CSV Import 
  •   Give the Description for the CSV Import if you want (Optional)
  •   Click   Start&Run Button .
    

Saving Import CSV
Saving Import CSV


Import CSV Finished
Import CSV Finished

 7.Viewing CSV Import Status:

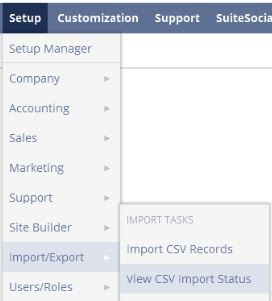
  •        we can view the status of the CSV Import status by Navigating Setup --> Import/Export --> View CSV Import Status. 

    Navigation for Viewing Status of CSV Import
    Navigation for Viewing Import CSV Status.


    • We can also check the CSV Import is done correctly are not by checking the Inserted an Updated Records 
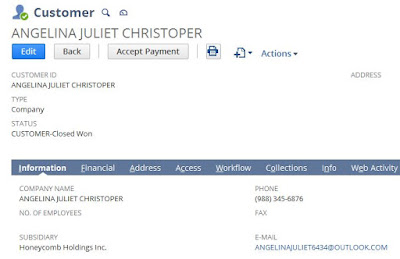
    • In our example we have created the CSV Import for Inserting and Updating Records to the Customer Record
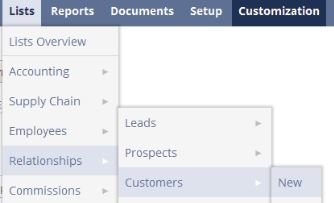
    • For checking the Customer Record Go to List --> Relationship -->Customer
     
Navigation for Customer Record


List Of Customers Record

Customer Record
Customer Record


Thursday, 21 January 2016

Parent Child Relationship In Netsuite

Parent Child Relationship In Netsuite:

we can create an Parent Child Relationship in Netsuite  with help of Custom Record Types.

For Creating New Record Type,Go To Customization --> List,Records&Entities -->Record Types --> New


Navigation for creating new Record Type


Parent Record Creation:

  1. Enter the Name for the Record . In our  example we create an record called "Degree".
  2. Enter the Id for the Record. If you forget to create an Id ,the Netsuite default functionality will create an numeric id automatically. we can create the id in text for our easy understanding.
  3. To make the custom record as an Parent Record click the "check box Allow Child Record Editing".
  4. Click Fields Tab to add an custom fields to the record.
  5. Click Subtabs Tab to add an Subtab to the record
  6. Click Links Tab to create an custom link to the record for easy access of that record.
  7. Click Save Button.

Step 1,Step 2 & Step 3:


Parent Record Creation


Step 4:


Creating Custom Field In Parent Record

Step 5:

Creating Subtab In Parent Record


Step 6:


Creating Custom Link to Parent Record

Child Record Creation:

  1. Enter the Name for the Record . In our  example we create an record called "Branch".
  2. Enter the Id for the Record.
  3. Click Save Button.
  4. Click Fields Tab to add an custom fields to the record.
  5. To make the custom record as Child Record,Create one custom field,give the Name and Id for that field as you like and choose the TYPE as List/Record ,LIST/RECORD as Degree and click the Check Box "RECORD IS PARENT".
  6. Click Display Tab in the same custom field and choose the value "Branch"  in the List Field PARENT SUBTAB  and Click Save.
  7. Click Links Tab to create an custom link to the record for easy access of that record.
  8. Click Save Button.

Step 1,Step 2 & Step 3:

Creating Custom Child Record.

Step 4 & Step 5:

Creating Custom Field In Child Record

Step 6:

Mapping the Parent Record Subtab to the Child Record

Step 7:

Creating Custom Link to the Child Record

Verifying the Output:

  •      Verifying the Parent Record:
                  1. Go To Customization --> List,Records&Entities -->Record Types 
                  2. Click the "Degree Record" from the List of Displaying Record.
                  3.Click Child Records Tab.
                  4.In that Child Records you will see the values "Branch" in Name Field and 
                   " Branch" in  Tab field.
                  5.The Value "Branch" in Name Field Represents the Custom record Branch
                      (Child Record).
                  6.The Value "Branch" in Tab Field Represents the Subtab in Created Degree 
                      Record(Parent Record).

              Step 1:

Child Records Tab 
  •          Verifying the Child Record         
                     1. Go To Customization --> List,Records&Entities -->Record Types 
                     2. Click the "Branch Record" from the List of Displaying Record.
                     3.Click Parent Records Tab.
                     4. In that Parent Record Tab you will see the value "Degree" in Name Field.
                     5.The Value "Branch" in Name Field Represents the Custom record Degree
                      (Parent Record).

           Step 2:

        
Parent Records Tab

  If both verification are correct,you have successfully created an Parent Child Relationship.
Thursday, 14 January 2016

Dependent Dropdown List in Netsuite

Dependent (or) Cascading Dropdown List in Netsuite:

First we need to create two Record Types.

For creating record types, we have to navigate to the menu Customization -->List,Records&Fields --> RecordTypes --> New.

Navigation for creating new Record Type.

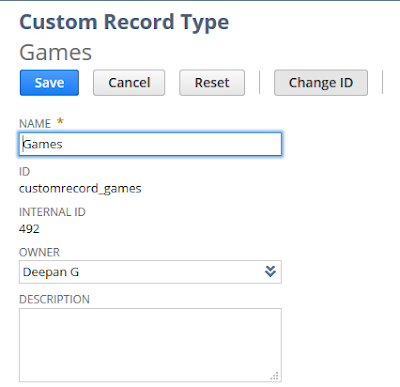
1.Record type Games:

  • Enter the name of the record. In our example we create an record called Games.
  • Give the id for that record.
  • And go to the tab links and choose the Center,Section,Category,Label,InsertBefore. Links are used to display the records types created easily as of user convention.
  •  Example :Choose Center as Classic Center,Section as List,Category as Custom and Label as Games.
  • click save.
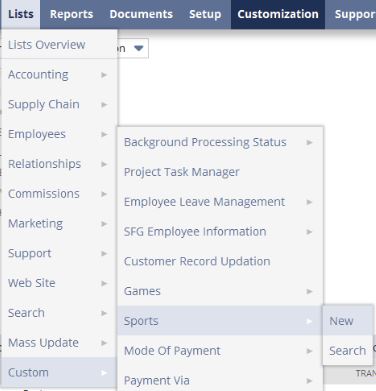
  • Enter the values in Games Record by navigating the menu Lists --> Custom -->Games --> New
  •    examples:
  •      1.Indoor Games
  •      2.Outdoor Games. 

           Step 1&2:

Games Record Type

      Step 3:

Custom Link for the Games Record

    Step 4:

Navigation for Games Record Type


    Step 5:

Adding values on Games Record


2. Record Type Sports:

  • Enter the name of the record. In our example we create an record called Sports.
  • Give the id for that record.
  • And go to the tab links and choose the Center,Section,Category,Label,Insertbefore. Links are used to display the records types created easily as of user convention.
  • Example :Choose Center as Classic Center,Section as List,Category as Custom and Label as Sports.
  • Click save.
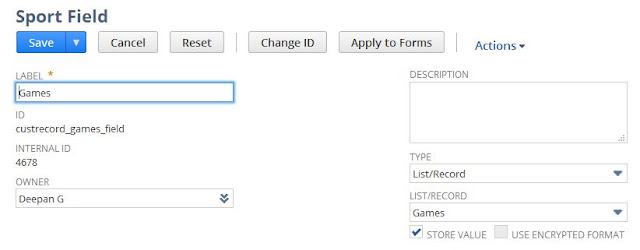
  • Click Fields tab and enter the Name,Id for the field and choose the Type as List/Record and choose the List/Record as Games
  • Click Save
  • Enter the values in Sports Record by navigating the menu Lists --> Custom -->Sports --> New
  •    examples:
  •      1.Badminton
  •      2.Table Tennis.
  •      3.Squash.
  •      4.Cricket.
  •      5.Football.
  •      6.Hockey.

     Step 1:

Sports Record Type Creation

Step 2:

Custom link for sports record

Step 3:

Adding New Field on Sports Record.


Step 4:

Navigation for the Custom Record Sports


Step 5:

Adding new values for Sports Record

 and then we need to create the two Entity fields and we have to map the two record types we have created to the entity field.

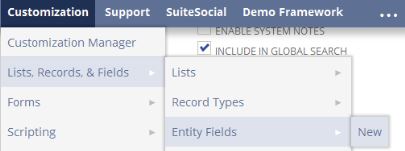
 For Creating the Entity types, go to the menu Customization -->List,Records&Entity -->Entity -->New
Navigation for creating new Entity Field

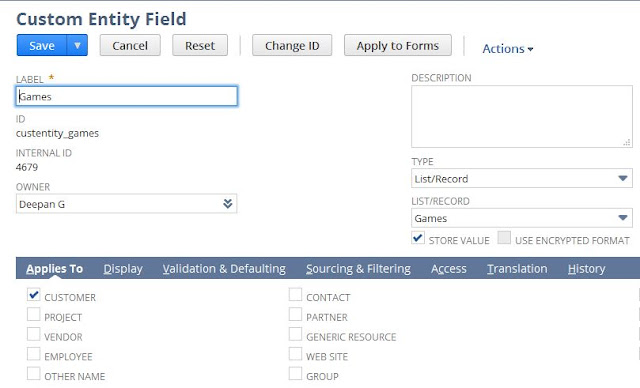
  1.Entity Games.

  • Enter the name of the Entity. In our example we create an Entity called Games.
  • Give the id for that Entity.
  • Choose the Type as List/Record and choose the List/Record as Games
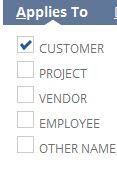
  • In Applies to tab,Click Customer,that means this entity will appear on customer record.
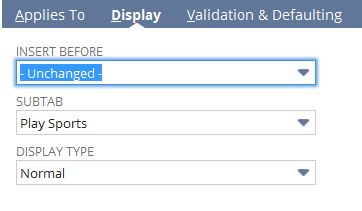
  • In Display tab click subtab as play sports,subatabs shows our content in separate area,it is easy to view.
  • Click save.   

Step 1 & 2:

Games Entity Field

Step 3:

Display tab for games entity field

         Custom Subtab Creation:

    Step 4:

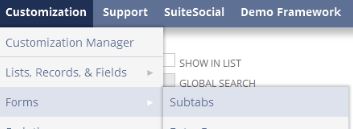
Navigation for creation new subtab

Step 5:

Creating the new subtab Play Sports

  2.Entity Sports

  • Enter the name of the Entity. In our example we create an Entity called Games.
  • Give the id for that Entity.
  • Choose the Type as List/Record and choose the List/Record as Games
  • In Applies to tab,Click Customer,that means this entity will appear on customer record.
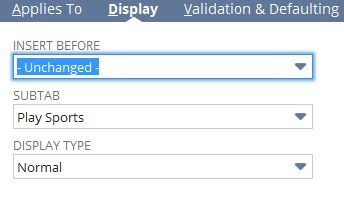
  • In Display tab click Subtab as play sports,Subtabs shows our content in separate area,it is easy to view.
  • In Source and Filtering tab Choose the Source list as games and source filter by as games
  • Click save.

Step 1:

Sports Entity Field

Step 2:


Applies To Tab for Sports Entity Field

Step 3:

Display Tab for Sports Entity Field

Step 4:

Source_and_Filtering Tab for Sports Entity Field

Step 5:

Navigation for creating new Customer Record.

Step 6:

Dependent DropDownlist